FIND OUT HOW YOU CAN UPGRADE YOUR LAPTOP RAM
Before we proceed on topic let’s understand what RAM means and what it is used for. RAM means Random Access Memory, your operating system uses the ram to temporarily store information of running processes and task. Upgrading the RAM means that more processes can run simultaneously. Here are few steps to take while upgrading your Ram.

CHECK YOUR MEMORY USAGE
You can check your laptop memory usage in windows task manager. Here you will see how much memory is being used out of the total available memory and how many are available for adding more memory.
CHECK IF THE RAM CAN BE UPGRADED
Unfortunately, many laptops have sealed bottoms or memory that’s fused into the motherboard; this situation prevents you from being able to upgrade your laptop RAM. Check the maximum amount of RAM your laptop can be upgraded to by either using crucial memory advisor tool.
OPEN THE BACK PANEL TO LOCATE YOUR MEMORY BANK
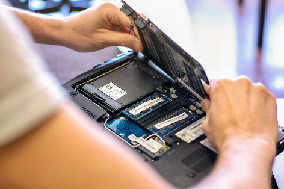
After everything has been confirmed, it is time to upgrade your RAM with the additional one. All you have to do is to first turn off your laptop and unplug the power adapter, open the back panel of your laptop that is covering the memory bank. You might need to unscrew it or just open it depending on the type of laptop you are using.
REMOVE MEMORY IF NECESSARY
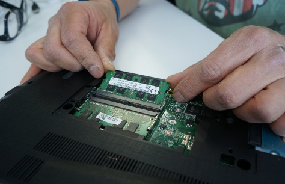
If all your memory slot is already filled, you will need to pull out the existing DIMMs in in order in order to replace them. To remove the memory module, push apart the clips holding it in place. The memory module should pop up at an angle. Bring the module out by holding the memory module by the edge without touching the gold connector at the back. If your laptop has an additional slot for fixing another RAM then you don’t need to take out the first one. Once the new RAM is in place, put back the rear panel and laptop battery. Turn on your laptop and it should automatically detect the new RAM module.

After upgrading the RAM of your laptop, it should be able to perform faster than before.
